How to add a view count to any page
In this article, I will share with you a few simple snippets and steps I followed to implement a view count in all my blog posts.

How does it work?
Firstly, every page needs a string that uniquely identifies it. This is important to programmatically keep track of each page's view count in our database. For my blogs, I used the blog's slug (the unique section of its URL and its filename). Now, every time we visit a page, we will do a POST request to our view-count route, specifying the page in the last section of the URL.
POST /api/view-count/tutorial-view-count
In this route handler, we will increment the view count by one for that page. Here, we will use an update-or-create query, so that the new pages are instantiated when they're visited for the first time.
We will also prepare a ViewCount component that will fetch the current count. Inside this component, we do a GET request to the same URL. The request will fall under a different handler, where we will simply return the current count for that specific page.
GET /api/view-count/tutorial-view-count
Switching between POST and GET like this is a good approach since we avoid using query params and body, and all we use is the same URL for both operations. POST for adding a view, and GET for returning the current number. Now let's get to work and add this feature to our projects.
This is what you will use:
- A REST API (I will use Nextjs API routes). To create the route handlers for the GET and POST.
- Prisma. This will help us set up the database and the schema we need in a few minutes, and provides us with an easy way to perform queries. (You can use it with lots of DBs. I always use MongoDB because you can get free cloud storage right away with Atlas).
- SWR: The best option for data-fetching in React.
And that's it! Now, let's go through it step by step.
1. Add Prisma to your project
Follow the official guide here
As a first step, navigate into it your project directory that contains the package.json file. Next, add the Prisma CLI as a development dependency to your project:
npm install prisma --save-dev
You can now invoke the Prisma CLI by prefixing it with npx:
npx prisma
Next, set up your Prisma project by creating your Prisma schema file template with the following command:
npx prisma init
This command does two things: 1) creates a new directory called prisma that contains a file called schema.prisma, which contains the Prisma schema with your database connection variable and schema models. 2) creates the .env file in the root directory of the project, which is used for defining environment variables (such as your database connection)
2. Set the database schema
Now, design the schema for the pages collection/table in the file that was generated in the previous step: prisma/schema.prisma. We have to include the unique string that identifies the page, and the count integer:
generator client {
  provider = "prisma-client-js"
}

datasource db {
  provider = "mongodb"
  url      = env("DATABASE_URL")
}

model blogs {
  id   String @id @default(auto()) @map("_id") @db.ObjectId
  slug String  @unique
  view_count Int
}
3. Create your MongoDB cluster and set the connection string in the environment variables.
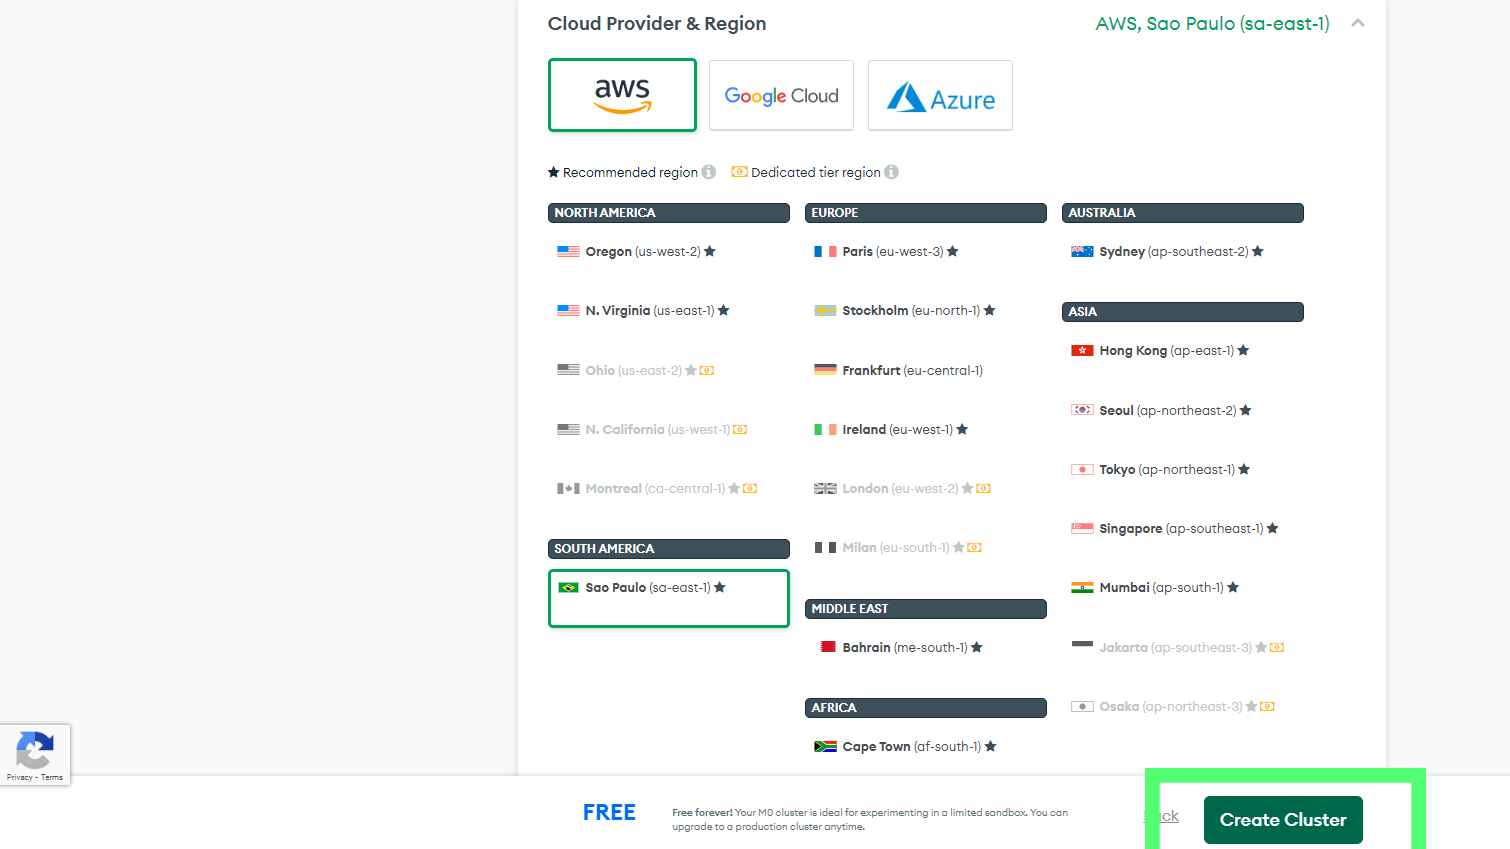
Set up an account on https://account.mongodb.com/account/login and create a free "shared" cluster.

The default settings are just fine. Pick a different server location if you want.

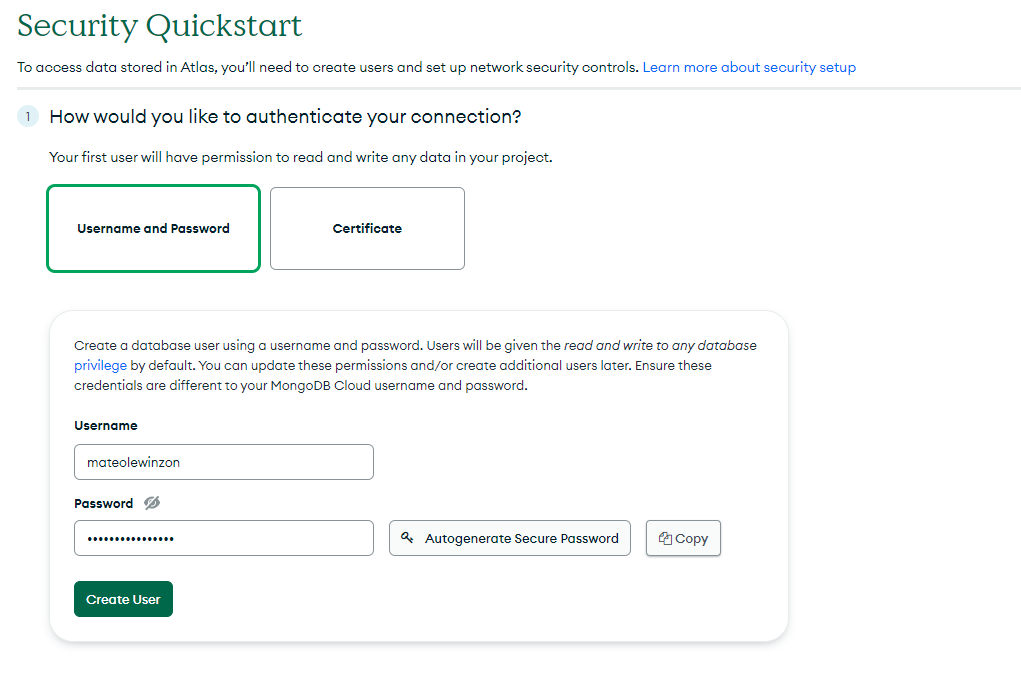
In the next step, you will have to create a user. This is what will give us access to query the database. The user can be whatever you want, and create a STRONG password using the auto-generate button. Save these credentials for the next step.

Atlas requires us to specify which IPs will connect to our database. Add 0.0.0.0/0 to allow connections from anywhere (this includes your current development computer and any possible production addresses). It doesn't seem to be the best of practices, but it doesn't mean the database won't be secure (unless your password is 123). In fact, it is the only way for Vercel apps.

Once the Cluster is created, click "Connect", then "Connect your application"

Now you should see the connection string. Add your username and password, and the cluster at the end (cluster0 by default). Store it as an environment variable named DATABASE_URL in your .env file. Prisma will pick this up and try to establish a connection. It should be something like this:
DATABASE_URL=mongodb+srv://username:password@cluster0.abcdefg.mongodb.net/cluster0
Then, install the Prisma Client. This will also run the generate command, tweaking the client according to your custom schema. This will allow us to make queries using methods over our schemas as defined properties of the client instance. E.g: prisma.blogs.upsert() This leads to a great dev experience.
npm install @prisma/client
We also have to push the Schema to our database.
npx prisma db push
Every time you change your schema, you should run npx prisma db push and npx prisma generate so that the changes are applied to both client and remote database
Lastly, create and export an instance of PrismaClient. If you're using NextJs, use this example to avoid an error involving multiple instances being generated in development.
import { PrismaClient } from "@prisma/client";

declare global {
  var prisma: PrismaClient | undefined;
}

const prisma = global.prisma || new PrismaClient();

if (process.env.NODE_ENV !== "production") global.prisma = prisma;

export default prisma;
Import and use that instance wherever you want in the server side of your app (For NextJs—in API routes or page functions).
4. Create the route handler
This is the only file I created to handle both POST and GET. Notice the way we take advantage of Next dynamic paths in the Next API Routes: The slugs of the route are captured in req.query.
Regarding Prisma, I'm using upsert so that in case the page doesn't exist in the database (it's being visited for the first time), it creates it with the view-count of 1. If the page exists, it increments view-count by one.
import prisma from "lib/prisma";
import type { NextApiRequest, NextApiResponse } from "next";

export default async function handler(
  req: NextApiRequest,
  res: NextApiResponse
) {
  const slug = req.query.slug as string;

  if (req.method === "POST") {
    const blog = await prisma.blogs.upsert({
      where: {
        slug,
      },
      update: {
        view_count: { increment: 1 },
      },
      create: {
        slug,
        view_count: 1,
      },
    });

    return res.send(blog.view_count);
  }

  const blog = await prisma.blogs.findUnique({
    where: {
      slug,
    },
  });

  res.send(blog?.view_count || 0);
}
5. ViewCount component with SWR.
Create the component that will fetch the data and return the current count. Here, let's use the SRW approach to fetch in the cache first, and also avoid using those ugly useEffects. I turned off the revalidateOnFocus option so that the view count is strictly tied to the number of times the page has been loaded.
import { useI18n } from "next-localization";
import useSWR from "swr";
import { fetcher } from "utils/fetcher";
import { SpanSecondary } from "./SpanSecondary";

export const ViewCount = ({ slug }: { slug: string }) => {
  const i18n = useI18n();

  const { data: views } = useSWR(`/api/views/${slug}`, fetcher, {
    revalidateOnFocus: false,
  });

  return (
    <SpanSecondary className="text-sm self-center">
      {views ? views : "-"} views
    </SpanSecondary>
  );
};
export const fetcher = async (
    input: RequestInfo,
    init: RequestInit,
  ) => {
    const res = await fetch(input, init);
    return res.json();
  };
6. Do a POST when visiting a page.
In the page, add a useEffect to do the POST.
useEffect(() => {
  fetch(`/api/views/${data.slug}`, { method: "POST" });
}, []);
NOTE: In my Typescript Nextjs app, useEffects were triggered twice in development because ReactStrict was set to true. If you encounter the same, you can disable it in next.config.js. In this case, the duplicate request lead to an error (I've never seen it increment two views at once, it just throws a database error). When using useEffect to make requests, always check the browser's developer tools network tab. Make sure each request is made only once.
That is all! This is what I'm currently using on this site. Please feel free to take a look at the repo and suggest changes or fixes. Thanks for reading!